HOW TO RESTORE AUTOMATIC REGISTRY BACKUPS IN WINDOWS 10 || BY DEVELOPERS MINDD
HOW TO RESTORE AUTOMATIC REGISTRY BACKUPS IN WINDOWS 10 || BY DEVELOPERS MINDD
A silent change that Microsoft implemented in Windows 10 version 1803, or April 2018 Update, made many believe that Windows 10 version 1809, often referred to as the October 2018 Update, came with another bug.
And given how buggy the October update actually was at the time of its launch, it’s pretty easy to see why many believed this was just another issue in the OS.
Microsoft disabled the automatic Windows registry backups in Windows 10 version 1803 for a reason that does make sense now when the software giant talks about it. The company says it wanted to reduce the amount of storage Windows eats up on the drive, so this feature was removed in the operating system.
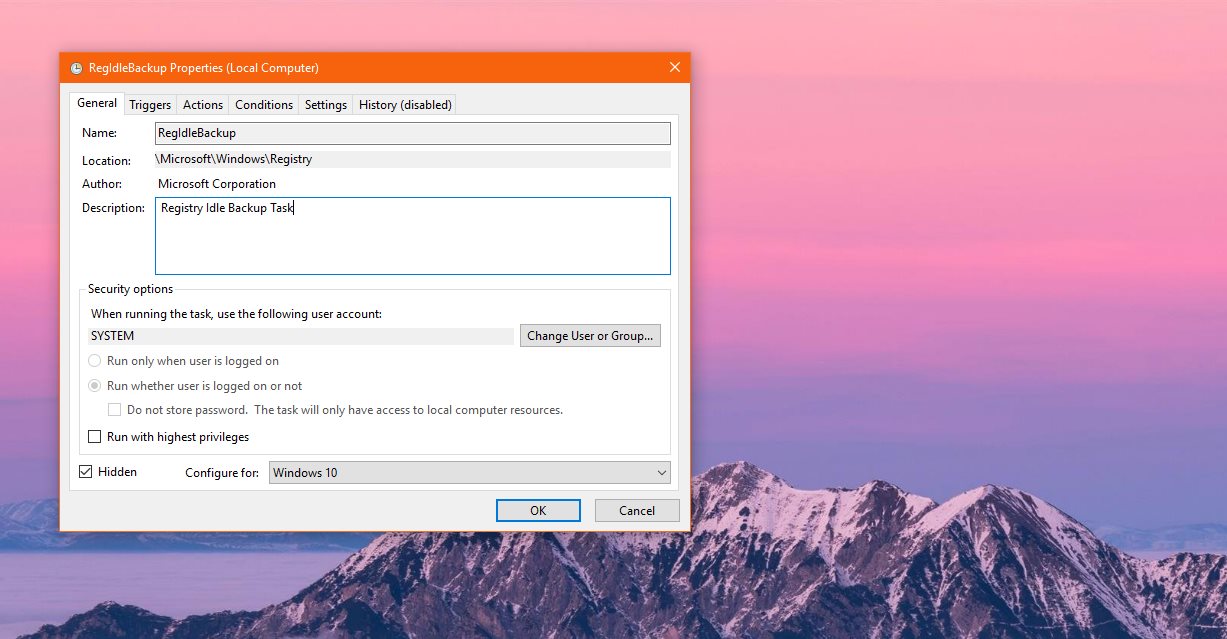
The registry backups were performed with automatic task in the Task Scheduler. But beginning with Windows 10 version 1803, despite the actual task still being listed in the Task Schedule, no backup is performed, with the typical files where the information was stored now display 0 kb in size.
Microsoft explains the change (which applies to all SKUs of Windows 10 version 1803, 1809, and 1903, including Education and Enterprise):
“Starting in Windows 10, version 1803, Windows no longer automatically backs up the system registry to the RegBack folder. If you browse to the \Windows\System32\config\RegBack folder in Windows Explorer, you will still see each registry hive, but each file is 0kb in size.
This change is by design, and is intended to help reduce the overall disk footprint size of Windows. To recover a system with a corrupt registry hive, Microsoft recommends that you use a system restore point.”
While Microsoft recommends users to stick with the system restore point feature, they can actually restore the legacy behavior and rely on the scheduled task to create a backup of the Windows registry.

Because the task is already there, what needs to be done to enable it is re-enabling a registry entry in the Windows Registry. To do this, first launch the Registry Editor by typing regedit.exe in the Start menu. Browse to the following location in the Registry Editor:
HKLM\System\CurrentControlSet\Control\Session Manager\Configuration Manager\
Look for a registry entry that is called:
EnablePeriodicBackup
If it doesn’t exist already, you need to create it manually. Right-click in the right pane > New > DWORD (32-bit) Value and use the aforementioned name. Double-click EnablePeriodicBackup and input value 1.
A reboot of the system is required to allow the task to run.
“Windows backs up the registry to the RegBack folder when the computer restarts, and creates a RegIdleBackup task to manage subsequent backups. Windows stores the task information in the Scheduled Task Library, in the Microsoft\Windows\Registry folder,” Microsoft explains.
The steps here work on all the aforementioned Windows 10 SKUs on version 1803, 1809, and 1903. The folder where registry backups are stored is the following:
C:\Windows\System32\config\RegBack
If you want to use restore points to create backups of your drives and of the Windows Registry, you first need to enable protection per each drive. To do this:
Start menu > System Protection > Select drive > Configure > Turn on system protection
You can then create a restore point from the same screen.
The same tutorial should work in future Windows 10 releases as well, as the aforementioned behavior should be applied for the next updates too – albeit at some point Microsoft could remove the scheduled task as well. I tested this tutorial in Windows 10 20H1 preview builds (the update rolling out in the spring of 2020) and everything seems to be working correctly.
Follow for daily updates and more information:-
- Facebook Page :- https://www.facebook.com/Developer-Mind-2388542071226328/
- Instagram :- https://www.instagram.com/developer_hackers/
- Twitter :- https://twitter.com/AyushBarapatre
- Pinterrest :- https://in.pinterest.com/ayushbarapatre/

Comments
Post a Comment